Wednesday, January 30, 2013

DIY Burlap Art


There are several ways to transfer an image onto fabric. I wanted to share how I transferred this vintage sewing machine image onto burlap to create this art piece.


I selected this great vintage image from my collection of images and printed it onto an 8.5 inch x 11 inch sheet of Avery transfer paper (#03275).  I printed my image using my ink jet printer as instructed and I carefully cut around the image. I prepared my burlap (15 inch x 15 inch) large enough so that I may have the option to use the print for an alternate project; however, you can cut your fabric to suite the size of your frame. I ironed the fabric and serged the edges to prevent fraying.


I centred my image on the burlap and pressed as instructed. I found that when I first tried lifting the image away from the fabric it still seemed sticky, so I flipped over the fabric and applied heat to the underside. This final step really made a great difference to the finish, and seems to "set" the image into the fabric.


I framed my finished piece in a vintage picture frame that I found at the thrift store. I am thinking however, of making a cushion with the panel of fabric.

What do you think of my new art piece?

Enjoy trying your own!

Tuesday, January 29, 2013

Thrift Store Find: Serger Accessory Feet Package


I just had to share my new thrift store find, which blew me away. I found this great Baby Lock - Accessory Feet Package at Value Village and I was stunned when I saw the price.


I paid just $6.00 for this package that is regularly priced at about $299.00. The package includes six serger feet, all in mint condition.


(left to right) 1. Ruffling Foot  2. Elastic Foot  3. Beading Foot   4. Blindhem Foot  5. Elastic Foot  6. Cording Foot

I really enjoy shopping at thrift stores, because you never know what you are going to find. Generally when I go I look for vintage sewing patterns, interesting pieces of fabric, or a milk vase to add to my ever-growing collection. I was very happy with what I found this time and I am looking forward to my next visit.

Have you had any great finds lately?

Sunday, January 27, 2013

Home Organization Challenge: The Living Room


I cannot believe that another week of our Home Organization Challenge has gone by. This past week the focus has been on getting the living room not just clean and organized, but getting it functional for all members of the family. I have to say that I barely made it to this deadline, not because it was a big mess, but I really needed help moving furniture around, and it took my husband doing a big share for it to get done by this afternoon.


One of the main challenges of this room was the very large entertainment unit. The unit is a beautiful wooden piece with lots of storage space, but it seemed to overwhelm the room. The top of the unit was also becoming the place to get things out of baby's reach and items would fall behind on a regular basis. There were several pieces of furniture in the living room that just had to go in order to create more space and less clutter.


Another important factor is the pending makeover of the living room in the next few months. My husband and I plan on removing the carpet and laying hardwood floors, we already purchased the wood and are looking forward to better weather to get things done. Our living room serves so many functions that it was very difficult to find a solution that we felt will work in the long term. We had things looking very lovely before, but it was not functional as we needed to accommodate all of our activities and still stay organized.


If you are thinking of making similar changes, keep in mind that this is not a seamless process. Unless you have ample space or an empty room available, there will be some chaos before the calm. Most of the items that did not make the "final cut," are now sitting in my dining area. Some items will be donated during the week, while other items will find a place in other parts of the house. I recommend using boxes or baskets to categorize items and to help move things around. You should also think very carefully about how you want each room to serve your purposes.

Next week's challenge:

Week 3 - The Bathroom(s)

To Do List:
  • Empty cabinets
  • Wipe and clean cabinets
  • Discard all empty bottles and purge expired items
  • Organize cabinets and label items
  • Organize medications
  • Organize bath towels and toiletries
  • Clean light fixtures
  • Wash walls and wipe doors and knobs
  • Clean bath area including grout
  • Clean sink and drain
  • Shine faucets
  • Wipe and sterilize countertops
  • Clean and sterilize toilet
  • Clean and sterilize floors
  • Clean windows and vents
You can take a look at Week 1 - The Kitchen or join the challenge on Facebook.


Thursday, January 24, 2013

Chunky Cowl


There has been such a wonderful response to my "Crochet In The Round" post that I have decided to do a follow-up, and to share with you how I created my chunky crochet cowl. As I have mentioned before, writing crochet and knitting patterns is something very new to me. I still have so much to learn, but I enjoy working with yarn and experimenting with different stitches.

I really love the colour combination of the other cowl, but I decided to try two new colours from the same Waverly for Barnet yarn collection. For this piece I used "Butter" and "Gypsy Gold."


Materials
  • 2 - 100g ball Waverly for Bernat (1 ball Butter - 55630, 1 ball Gypsy Gold - 55640) or approx. 180m/197 yards medium weight (#4) acrylic yarn
  • US Size 10.5 (6.5 mm) crochet hook
Gauge
10 sc = 4" (10cm)

Size
One size fits all. The finished size is approx. 10” high and 38” around.

Pattern
Using two strands of yarn, ch 84 (leaving approx. a 4 inch tail). Being careful not to twist join with sl st in the beginning ch.

Round1: ch1, *in back loop of next ch, yarn over and pull through loop, now you have three loops on hook, pull last loop through other two loops and repeat around

Round 2 - 6: repeat from * around

Round 7: sc in back loop of next ch and repeat around

Round 8: **sc through both loops and repeat around

Round 9-12: repeat from ** around

Round 13: *in back loop of next ch, yarn over and pull through loop, now you have three loops on hook, pull last loop through other two loops and repeat around

Round 14-18: repeat from * around

Round 19: sc in back loop of next ch and repeat around

Round 20 – 24: **sc through both loops and repeat around

Finishing
Fasten off. Cut yarn leaving a tail and weave in ends.

Note
For round 1 to 6 and 13 to 18 work as you would to create a half double crochet, but without the last loop.

ch(s) = chain(s)
sc = single crochet
sl st = slip stitch


Here is a printable version of the pattern: Chunky Crochet Cowl Pattern.

Please let me know if there are any errors or problems with the instructions. I will also be happy to answer any questions you may have.

Enjoy!

Terms of Use: This pattern and anything made from it may not be used for commercial purposes. You may not sell anything made from this pattern. You may not resell or redistribute this pattern in part or in whole. Derivative works are prohibited. This pattern and items made from it are intended for personal or charity use only. Copyright © 2013 Crafted Spaces | Yvette-Michelle Cottle Darby. All Rights Reserved.


UPDATE:
You can find the finished scarf available for sale on my Etsy Verona Collections shop. Thank you!


Tuesday, January 22, 2013

Projects In The Works


This morning when I awoke, I just felt like going into hibernation when my husband announced that it was -27 degrees with the wind chill. I took the picture above yesterday afternoon, and as you can see we have had a lot of snowfall and this morning there was even more snow on the ground. With days like these I try to think of it as a rain day, like the ones I had as a child growing up in Trinidad and Tobago. I would use such a day to explore and create all the crafty things that came to mind, it was a perfect day to spend creating when going outside simply was not an option.

Today I decided to have my own snow day and I have been working on several projects. I wanted to share a few of my projects with you.


Chunky Crochet Cowl


This is a follow-up piece to the post Crochet In The Round. I lost the original cowl on a trip (I really loved it) and I did not make note of the pattern I created. I have been working at making another cowl and writing the pattern. I am working off of the pictures I originally took, and luckily for me I took tons of pictures and I have a complete file of the original project. I love the colour combination of the original, but I decided to try something new.


Pillow


I found the tutorial for this pillow some time ago, and I posted it on my Pinterest Sewing Board. However, when one of my young sewing students brought it to the studio and wanted to make it as one of her projects, I decided to try it as well. I started working on it over the holidays, but have been so busy that I have not finished. I am adding embroidery details and I am creating somewhat of an embroidery sampler. I really love the little French knots shown in the picture above, and I will be sure to post the details when I am finished.


Embroidery Patterns


I have a few new embroidery patterns that I am creating. I recently got some new embroidery hoops and I am awaiting an order of Sulky iron-on transfer pens for the studio. I am hoping to have my new embroidery patterns available on the online shop when they are ready. I am also introducing an Embroidery Workshop this spring, which I am very excited about. If you will like a fun embroidery project, check out the "Create" embroidery pattern.


First Sewing Project


Do you have your first sewing project? Well, I wanted to share one of my first machine sewing projects with you. I was about eleven years old when I made this pillowcase and I fell in-love with sewing and embroidery work. I also remember making a potholder that looked like a watermelon slice. I will be doing a new version of this project some time soon.

Thanks for joining me today!

Sunday, January 20, 2013

Home Organization Challenge: The Kitchen


On Monday, I launched a "Home Organization Challenge" and started things off with a focus on the kitchen. The idea is to tackle a little bit each day until the task list is complete. Having a deadline really helped me because it meant that there was no room for procrastination. I approached a couple things each day, and dedicated about an hour a day to getting things done (including today).

When I started this challenge, I really did not think that my kitchen was as bad as it really was, and I have to confess that it was a lot more work than I thought it would be. Everything on the surface seemed clean and organized within reason, but once I started pulling things out and reorganizing things, there was a lot to do. The kitchen was a great place to start, since so much seems to happen in the kitchen and it is the view from my sewing studio.


I created a space for the different activities in the kitchen and really wanted to have the countertops as clear as possible.


My family and I tend to eat a lot of fresh produce, so there is very little in the way of cans or boxes with dried goods. With the exception of some died pasta, various types of rice, tuna and a few cans of beans there really is not much in our cabinet. I was therefore able to condense the food panty into one section of the cabinets.


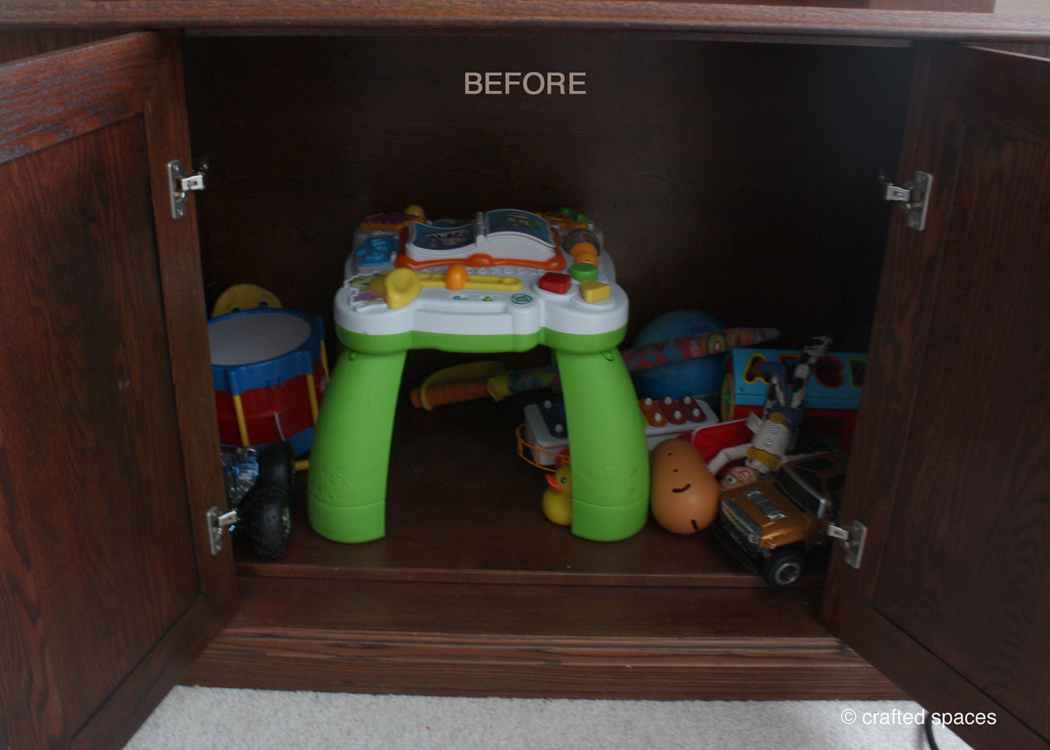
Originally this cabinet had a mishmash of dishes, but now it makes a wonderful little food pantry. I was lucky to find some great glass jars at the dollar store, which is the perfect size for the cabinet.


Glass jars $1.00 mini jar, $2.00 for the Small (not shown), Medium and Large jars at the local dollar store. Surprisingly good quality and works really well for my little panty. 


The biggest challenges were cleaning the glass stovetop, which gets wiped at the end of each day, but still had a lot of baked on residue. Another challenge was deciding which items had to go and sending them off in a donation box.


Now every nook and cranny in the kitchen is clean and everything has a place. I did not want to use a lot of harsh chemicals, so I relied a lot on some natural home cleaning agents.


Here are my partners in grime fighting. Okay maybe that was a little cheesy, but you will be amazed at how much cleaning power is in white vinegar, baking soda and lemon.

This is not a decorating blog; but the idea here is to get organized, which can help create an environment where creative thinking and an opportunity to create becomes a lot easier. When you are the person that is constantly asked where things are in your home, it is obvious that things need to be better organized to accommodate all members of your household. I also find it very distracting to work from home when I think about how many household things need to get done. If you also work from home then you can also relate to having a clean, organized home as a great way to welcome clients.

Next week's challenge:

Week 2 - The Living Room

To Do List:

  • Sort and purge items into four categories; keep, donate, trash and other room.
  • Dust, wipe clean, and polish.
  • Clean windows and drapery.
  • Clean lamps and other light fixture(s).
  • Clean and organize entertainment or media centre.
  • Clean television screen.
  • Dust electronics.
  • Spot clean sofa where needed.
  • Wash walls and trim.
  • Wash vent covers.
  • Mop floors, vacuum or otherwise clean floors.
  • Organize cabinets, shelving or other storage areas.
  • Sort books, magazines and DVD's, and purge unwanted items.
  • Create a donation box with items that are in good condition.

Remember to take before and after pictures. Visit our new Pinterest board for cleaning tips and tricks.


Wednesday, January 16, 2013

Crafty Idea: Decorative Picture Mat


There are lots of wonderful ways that you can decorate a picture frame and matting. I wanted to try doing something playful and I really like the "Virserum" picture frames from Ikea, it is the perfect choice for this project.


I found a great vintage print in my collection of images and printed it on plain card stock. I did not want to take away from the print, but I wanted to try something colourful. I used my collection of "Sharpie" and "Tombow Dual Brush Pens" and doodled a floral pattern around the matting. I used several coloured pens, but I think it will also look great with just black and white.

What do you think?


Monday, January 14, 2013

Home Organization Challenge


It is a new year and I have challenged myself to a 12-week get organized challenge. The goal is to get my home organized in 12 weeks. I am hoping that by Easter my home is in tiptop shape and that every room is put together. The biggest part of this challenge is going to be my basement (way too many things). To get a handle on things, I recently took advantage of a recent sale on storage containers at Wal-Mart. Over this past weekend, I also got a variety of storage contains for the kitchen and bathrooms.

Working from home means that many of my activities tend to spill over into other parts of the house. It also means that things can become very distracting. I know that my 12-week challenge is a bit on the overly ambitious side, but I figure this way I am sure to get more done. Just to make sure that I do not procrastinate, I will create a blog post each Sunday to show my progress.

The plan is to conquer one area of the house each week until the house is completely organized. I will post the target areas, along with a list of items to be targeted. If you will like to join in the challenge, share your progress through comments on the post(s) or join our Facebook page event.

Week 1 - The Kitchen

To Do List:
  • Empty the contents of the cabinets and refrigerator.
  • Wipe clean, discard expired items, and purge any unwanted items, things that do not belong or items collecting dust.
  • Select only the items that are useful and group them.
  • Collect storage containers needed to create a unified look and functional space.
  • Organize cabinets, draws and refrigerator.
  • Mop floors and wipe cabinet doors, counter tops and walls.
  • Clean all appliances.
  • Clean light fixture(s).
  • Create a donation box with extra kitchen items that are in good condition.
Everyone has a method for how they like to do things in their home; so if you will like to join in the challenge, please share with us how you tackled the task list. I will share with you how I approach things each week and any helpful tips I may find along the way.

Happy organizing!


UPDATE

Week 2 - The Living Room
Week 3 - The Bathroom(s)
Week 4 - The Basement (Part I)
Week 5 - Master Bedroom
Week 6 - Kids Bedroom
Week 7 - Home Office
Week 8 - Laundry Room
Week 9 - Closets
Week 10 - The Basement (Part II)
Week 11 - Dining Room
Week 12 - Studio


Visit our Pinterest boards:
Organizing and Storage
Cleaning Tips and Tricks


Thursday, January 10, 2013

Pattern Storage Boxes

Getting organized and staying organized seems to be an ongoing process. I was finally able to find resealable bags for my patterns and I am hoping they will arrive by early next week. Finding the right size seemed to be a challenge, so I am hoping they work. The plan is to include a note card with each pattern to document any changes I may have to make or other sewing details.

The other task was finding a simple but "pretty" solution for storing the patterns that I use during my sewing classes. I originally had the lofty ambition of making fabric baskets for them, but soon abandoned the idea when I realized I just do not have the time right now.


I have a draw in the basement half of my work space, where I store the bulk of my supplies and patterns. However, in the sewing studio I wanted easy access to the patterns that I use on a daily basis for my classes and sewing kits.


I found these two beautiful "Raymond Waites" storage boxes at Michaels and I am wondering if I should not be getting a couple more. They are bright and cheerful and the perfect colour combination for my sewing room. They hold quite a bit of patterns in an upright position, which makes it easy to flip through the patterns. They also fit perfectly in my "Billy" Ikea bookcase.


Classes and workshops restart next week and I feel like there is still so much to do before I welcome my students. I figure little by little each day and I should be ready.


Wednesday, January 9, 2013

Crafty Idea: Scrap Pincushion

On January 4th, I had the pleasure of assisting a very nice lady and her friends and family with a project to make 100 diapers. I received a call just before Christmas and was moved by her story and the wonderful act of kindness she proposed. To assist with her project, I donated time in the sewing studio and my assistance. Her goal was to make 100 diapers for the families of a remote community in Mexico that her family have "adopted" and provides assistance to in a number of ways.

For several hours my home and studio was bursting with activity and an overflow of diaper fabric. In the end we were able to make 80 flat diapers from the material she brought to the studio and she had additional diapers donated by other friends. I was happy to be a part of her efforts and I look forward to other such opportunities.

This leads me to today's project, which is a simple pincushion made from a scrap of corduroy fabric (from another project) and some of the ends of fabric that remained from serging the diapers.


1. Sew scrap fabric (5.5" x 6") with 1/2 inch seam and leave one side open.  |  2. Stuff with shreds of fabric to desired firmness  |  3. Fold in open ends 1/2 inch and use pins to hold in place.  |  4. Hand stitch opening or close using sewing machine.

It is a reminder that it only takes a little to do a lot.


Tuesday, January 8, 2013

Book Review: The Perfect Pajama


The Perfect Pajama by Kristina Nilsson and Jennifer Pirtle

I had seen this book some time ago, and I decided to add it to our Crafted Spaces reference library. Last year we introduced a new workshop called "Pyjama Party" to our program and I feel that this book is a great resource for students. It is easy for a beginner to follow, yet has a range of projects to inspire a more experienced sewer.

The book has twenty-one wonderfully creative ideas for pyjamas that you can make for him, her or little ones. Each design is presented with clear instructions, full colour illustrations and great photographs to assist you with each step. There is something for everyone in this book, including fun ways to add creative touches to kids pieces, as well as a few other projects that you can try.

my recent pyjama shorts project
Sewing pyjamas can be lots of fun and there are tons of great details you can add to your project. A week ago I made myself these sheep flannel pyjama shorts (Butterick - B5153) and I added a simple machine embroidery stitch along the side seams. I already have my next pyjama project planned and I am looking forward to adding some eyelet details as shown in the "Blue Lagoon" project featured in the book.


I also think that many of the designs in this book can be combined to create beautiful unique pieces. The "Cherry Checks" project shown below is also a great example of a project that can work well for both kids and adults.


As an added bonus, the book also comes with full-size patterns and templates for each project. This also makes it a great buy. ISBN 978-1-906525-96-5

*As with all of our book reviews, this review was not solicited or endorsed in any way. The opinions expressed are my own and is presented in the spirit of sharing.

Related Posts Plugin for WordPress, Blogger...